SAML SSO Connections
A SAML SSO connection makes MojoAuth the SAML 2.0 Identity Provider (IdP) for an enterprise app (the Service Provider, or SP). This is how you enable "Log in with SSO" in apps like Salesforce, Zoom, Zendesk, Workday and hundreds of others.
Each connection has its own IdP identity (its own entityID, URLs and signing certificate) — so every SP you connect is fully isolated.
The two-sided handshake
SAML SSO requires each side to trust the other. You exchange two sets of values:
| MojoAuth (IdP) gives the SP | The SP gives MojoAuth |
|---|---|
| IdP metadata URL, SSO URL, SLO URL | SP Entity ID |
IdP signing certificate (.crt) | ACS URL (Assertion Consumer Service) |
| (optional) SP metadata to import the above |
Chicken-and-egg, solved. Many SPs (e.g. Salesforce) need your IdP URLs before they'll give you their metadata. That's why MojoAuth creates the connection from just a name first, shows you the IdP values immediately, and lets you add the SP's details afterwards.
Create a SAML connection
Name it (creates a draft)
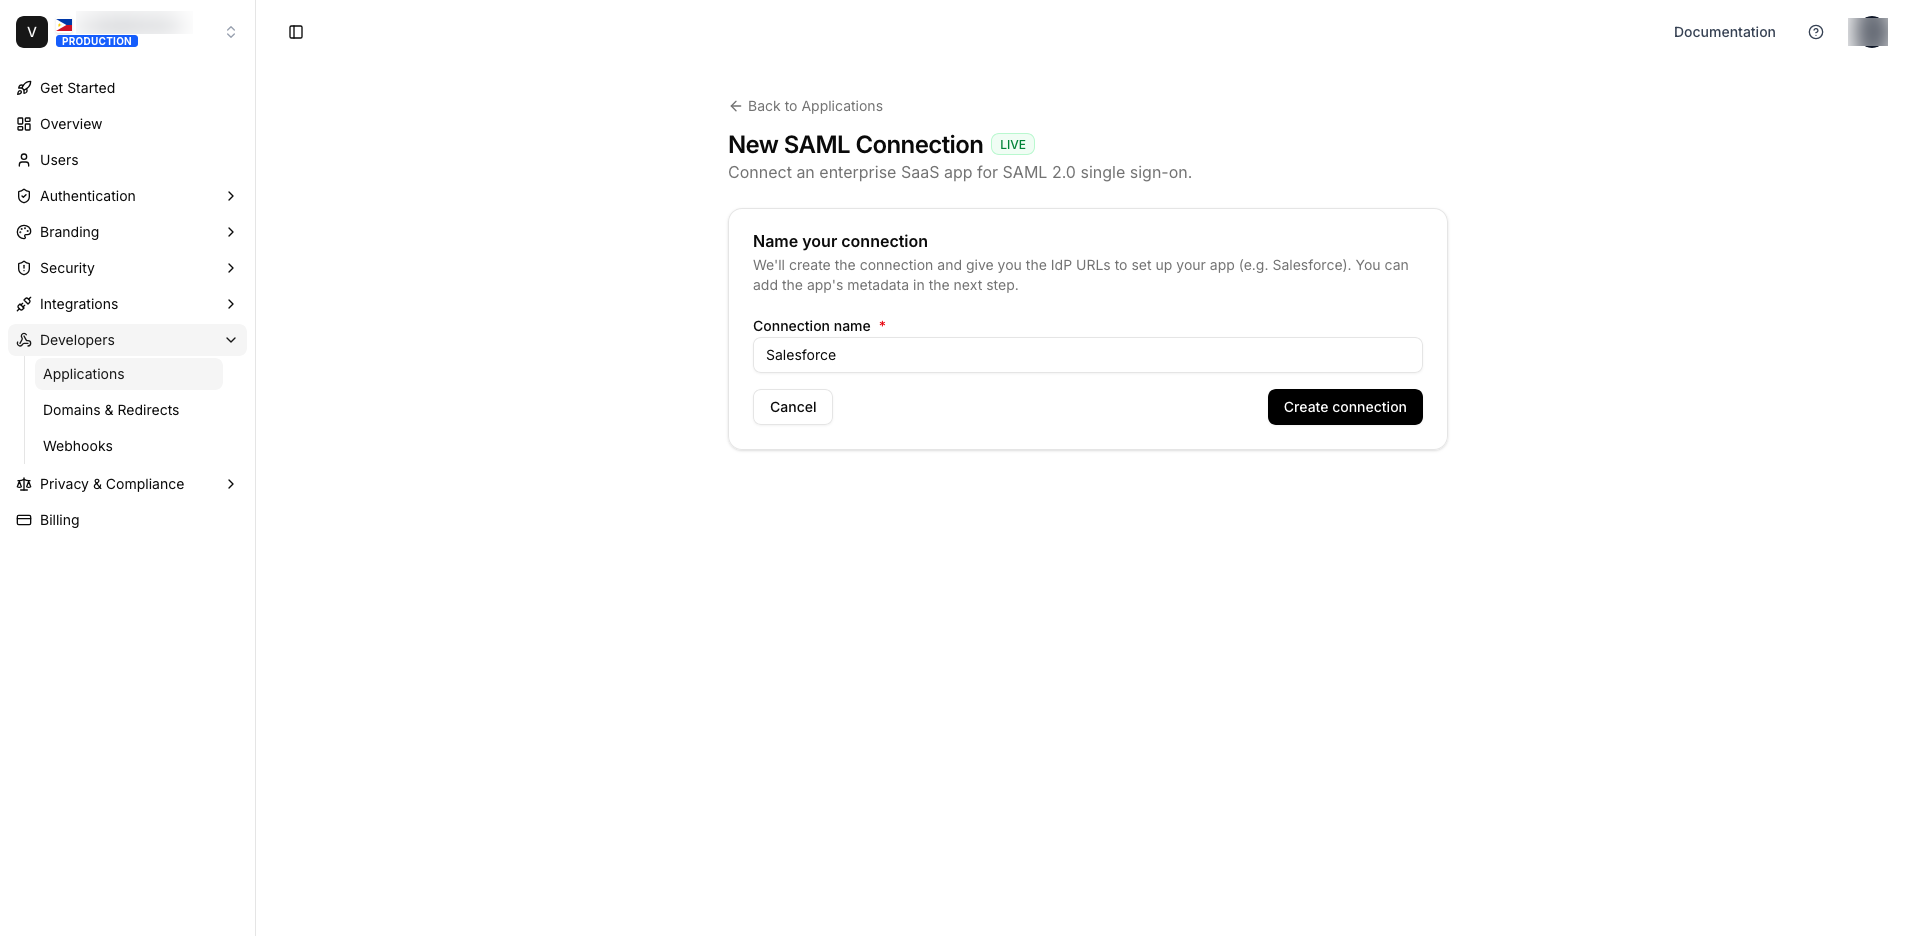
Developers → Applications → New Application → SAML 2.0 SSO. Enter a Connection name (e.g. Salesforce) and click Create connection. MojoAuth creates the connection and auto-issues its signing certificate.
Copy the IdP values into your app
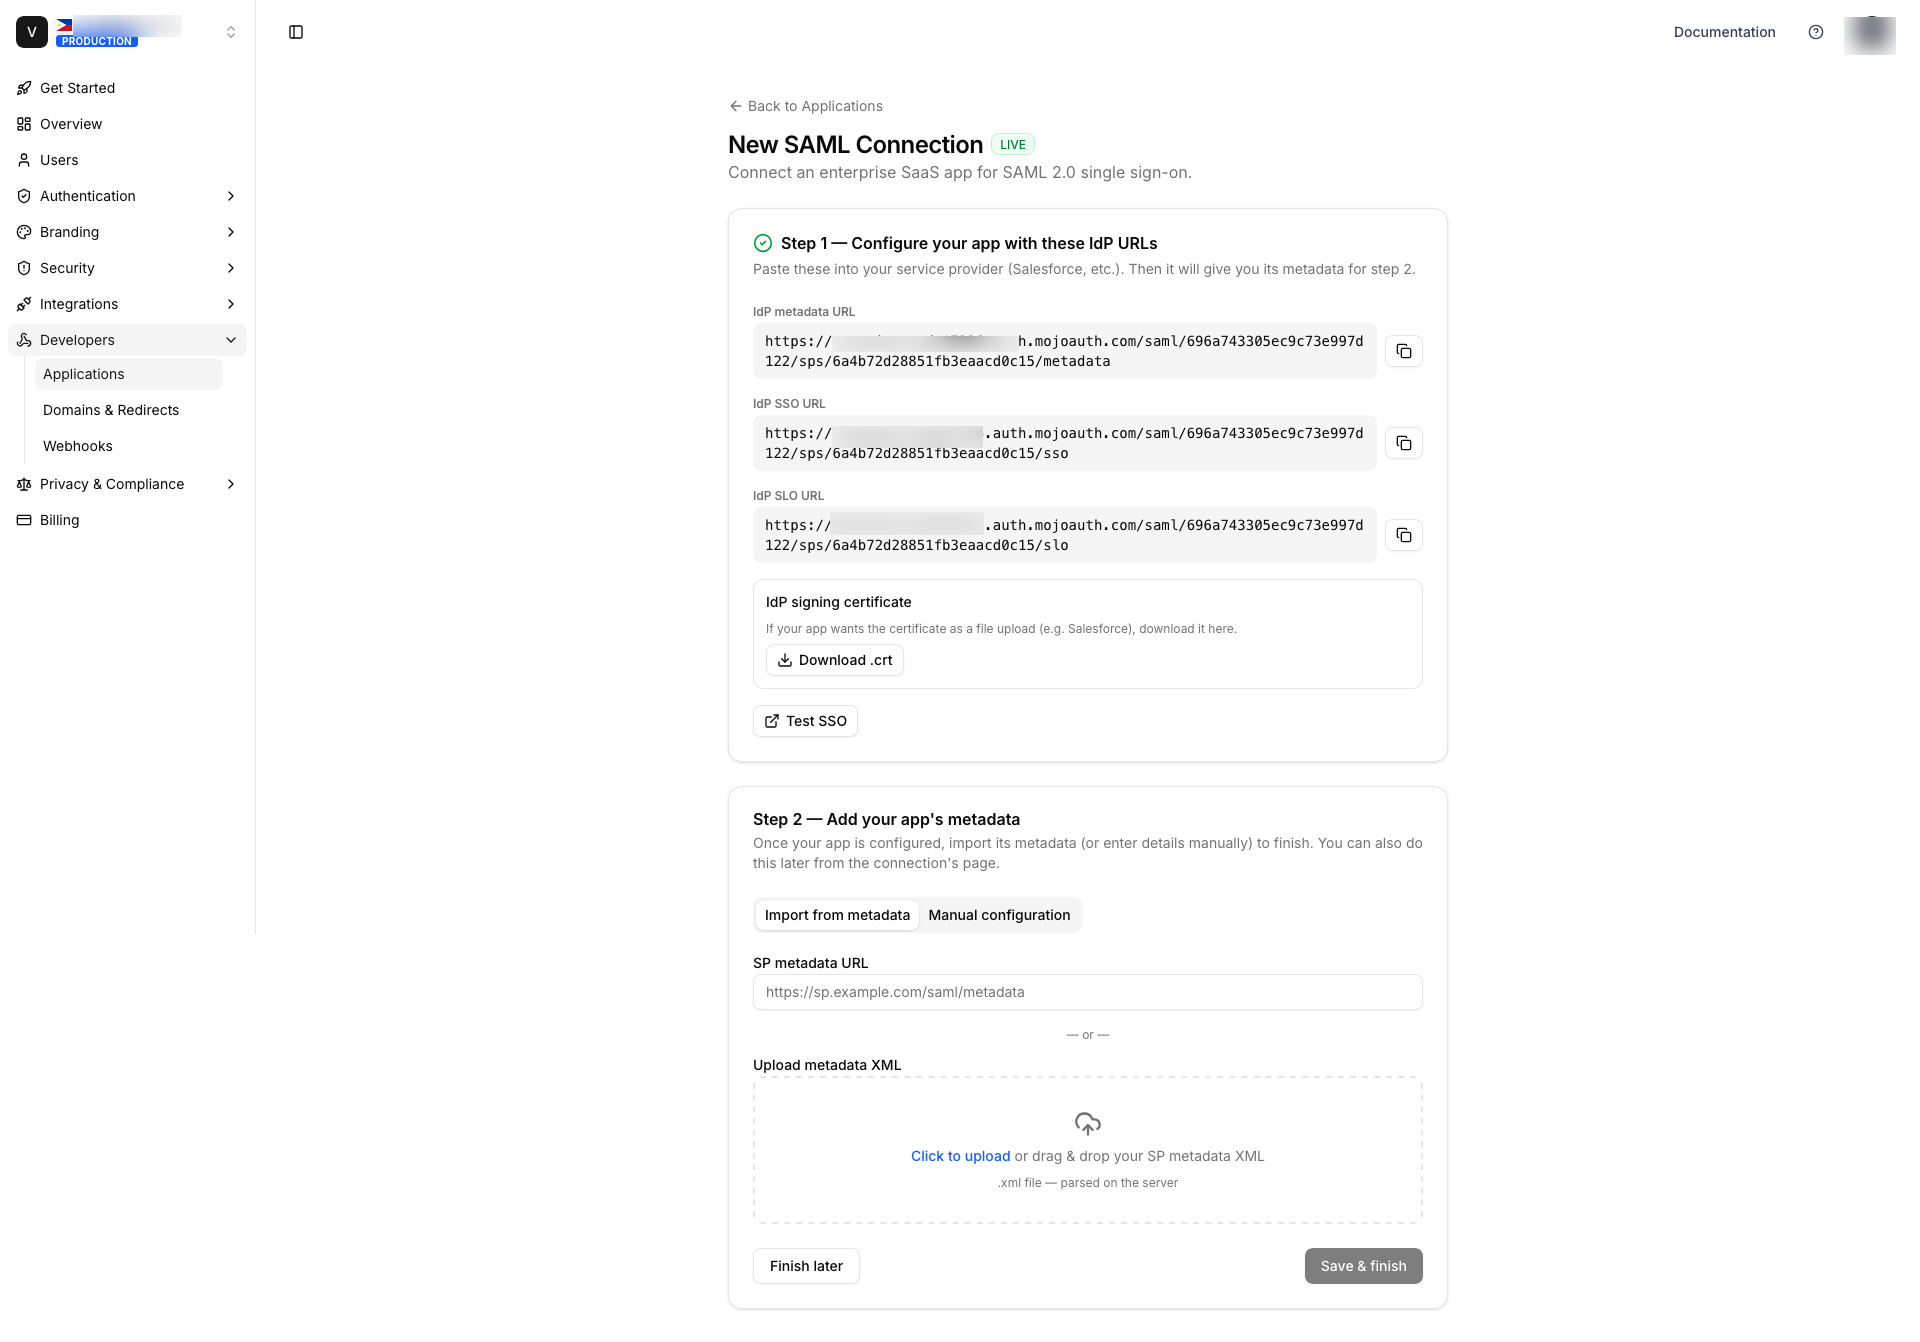
The page now shows the connection's IdP URLs. Configure your SP with these:
| Value | URL pattern |
|---|---|
| IdP metadata URL | {BASE}/saml/{projectId}/sps/{spId}/metadata |
| IdP SSO URL (SAML endpoint) | {BASE}/saml/{projectId}/sps/{spId}/sso |
| IdP SLO URL (Single Logout) | {BASE}/saml/{projectId}/sps/{spId}/slo |
| IdP signing certificate | Download .crt / Copy PEM button |
Some SPs read everything from the IdP metadata URL in one shot. Others (like Salesforce) ask you to paste the SSO URL and upload the signing certificate as a file — use Download .crt.
Add the SP's details back
Once the SP is configured, it produces its metadata. Complete the connection one of two ways:
- Import from metadata — paste the SP's metadata URL, or upload / drag-drop its XML.
MojoAuth parses the
entity_id,ACS URLand certificates automatically. - Manual configuration — enter the SP Entity ID and ACS URL by hand.
Add attribute mappings & Save
Map the SAML attributes the SP expects (see below), then Save. The connection is now live.
Attribute mappings
Attribute mappings control what user data goes into the SAML assertion. Each row is:
{ "saml_name": "User.Email", "source": "email", "name_format": "basic" }saml_name— the attribute name the SP expects (e.g.User.Email,firstName).source— either a user field (email,firstName,lastName,phone,identifier,userId) or a constant value typed in (e.g. a Salesforce Profile ID,en_US, a timezone).name_format—basic,uri, orunspecified.
Example (Salesforce Just-in-Time provisioning):
[
  { "saml_name": "User.Username",             "source": "email",                 "name_format": "basic" },
  { "saml_name": "User.Email",                "source": "email",                 "name_format": "basic" },
  { "saml_name": "User.LastName",             "source": "lastName",              "name_format": "basic" },
  { "saml_name": "User.FederationIdentifier", "source": "identifier",            "name_format": "basic" },
  { "saml_name": "User.ProfileId",            "source": "00eg5000005snnE",       "name_format": "basic" },
  { "saml_name": "User.TimeZoneSidKey",       "source": "America/Los_Angeles",   "name_format": "basic" }
]
NameID format
The NameID is the primary subject identifier in the assertion. Choose the format the SP expects:
| Format | Subject value |
|---|---|
emailAddress | the user's email |
persistent | a stable per-SP pseudonymous ID |
transient | a fresh random ID each login |
unspecified | the user's identifier |
NameID format is an IdP-side choice — set it to match what the SP requires. It is not taken from the SP's metadata.
Signing & encryption options
| Toggle | What it does |
|---|---|
| Sign assertion | Sign the SAML assertion (recommended, usually required). |
| Sign response | Sign the outer SAML response. |
| Encrypt assertion | Encrypt the assertion to the SP's certificate. |
| Require signed AuthnRequests | Reject SP requests that aren't signed. |
Runtime: SP-initiated vs IdP-initiated
SP-initiated (user starts at the SaaS app):
1. User clicks "Log in with SSO" in the SaaS app.
2. SaaS app → {BASE}/saml/{projectId}/sps/{spId}/sso   (SAMLRequest)
3. MojoAuth authenticates the user (hosted login).
4. MojoAuth POSTs a signed assertion to the SP's ACS URL → user is in.
IdP-initiated (user starts from a MojoAuth launcher):
{BASE}/saml/{projectId}/sps/{spId}/init → MojoAuth authenticates → POSTs an unsolicited assertion to the SP's ACS.Use the Test SSO button on the connection page to run IdP-initiated login end-to-end in a new tab.
Single Logout is available at .../slo (SP-initiated) when the SP supports it.
Next steps
- Manage the connection — edit, enable/disable, delete.
- Connecting a specific product? See the Integration Guides.